Homemade Bandsaw
Earlier in the year, I purchased and started building Matthias Wendel’s bandsaw ([http://woodgears.ca/bandsaw/homemade.html]). I originally tried to keep track of my time spent… but lost track over the months building it. I’m fairly sure that I’ve spend at least 100 hours building it.
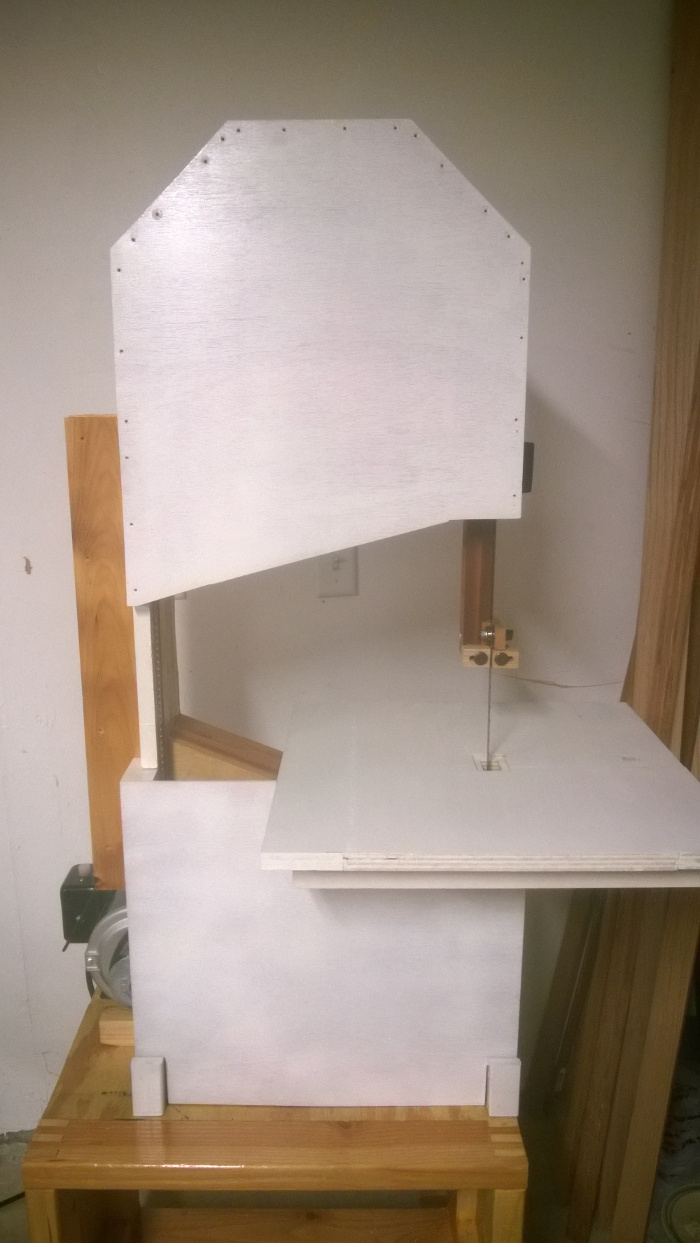
In general, I thought the directions, diagrams, and other information was fairly complete and clear. I found a few places I’d probably make additional notes (see later), but I otherwise had no problem following them. They are written assuming you have a decent amount of woodworking experience, and can improvise as needed, given your tooling and supplies (i.e., it is not written as a do step 1/2/3 exactly as written kind of directions).
At this point, I have the saw working and can start using it. It only has a fixed table and a partial cover, but I did make some pushsticks earlier, and the saw worked just fine. I think it’s relatively low on vibration (though I’m not a connoisseur of bandsaws), and the blade guides seem to be working just fine.
Notes on Directions
I found the directions a little unclear or lacking in only a few places: * Bracing triangles for the frame: Upon re-reading, their intended meaning is clear, but the first time I cut them, I made the longest side adjacent to the right angle the length directed. Well… the longest side is the hypotenuse. Recut! * Getting the table support lined up took some effort. As I recall, I ended up mounting the wheels, the blade, and the upper blade guide, and positioning the support that way. * At one point in the process, you will have the wheels mounted and will really want to try it out with a motor. Sometime later in Matthias’ directions, he’ll mention that at without part of the bottom cover installed, the frame+wheels is really top-heavy. This should be listed earlier… Embarrassingly, I hooked up a motor with clamps, tried it out (worked but wheels needed balancing), and in my excitement, started taking things off… and forgot that it was top-heavy. It took a tumble off my workbench! Luckily, both my cyclone separator and my leg took the brunt of the fall and adjusted trajectory. One wheel was dented, as was the bottom of the frame, but no other damage (well, the cyclone needed repair, and I only had a few bruises). The whole thing really is extremely solid.
Wood Re-used
I started with some 1x12 pine shelving that used to be in closests in the house (for several decades, I’m guessing). The shelving was old and dirty, never having been finished properly (aside from a few boards with faux wood plastic film applied). I had ultimately replaced most of the shelving with premade shelving (partly due to not wanting to sand/prime/paint the wood, and partly with the desire to use it as wood for a project some day).
Matthias mentions on at least one reader submission that he is jealous everyone else’s comes out better… perhaps not something he’ll say about mine! I’ve realized that I perhaps did not cut as precisely on either ripping or length as I should, so there are some gaps in the butt joints of the frame, and some places where every other layer pokes out more, but that won’t ultimately affect strength.
Since it was fairly dirty, somewhat warped, and an inconsistent thickness, I felt the wood needed planing… which resulted in the purchase of a thickness planer. Seems like a tool that, now that I have one, I’ll wonder how I got by without. I only barely shaved the outer layers of the boards off, just to clean up the surface, so I didn’t run into any sniping issues (as I planed after I cut everything to size).
Most of the other wood I managed to re-use was hardwood scraps I had bought from a woodworker’s garage sale (they were downsizing) years ago; my spouse is quite glad I’m finally using up some of my scraps.
Gluing up the Frame
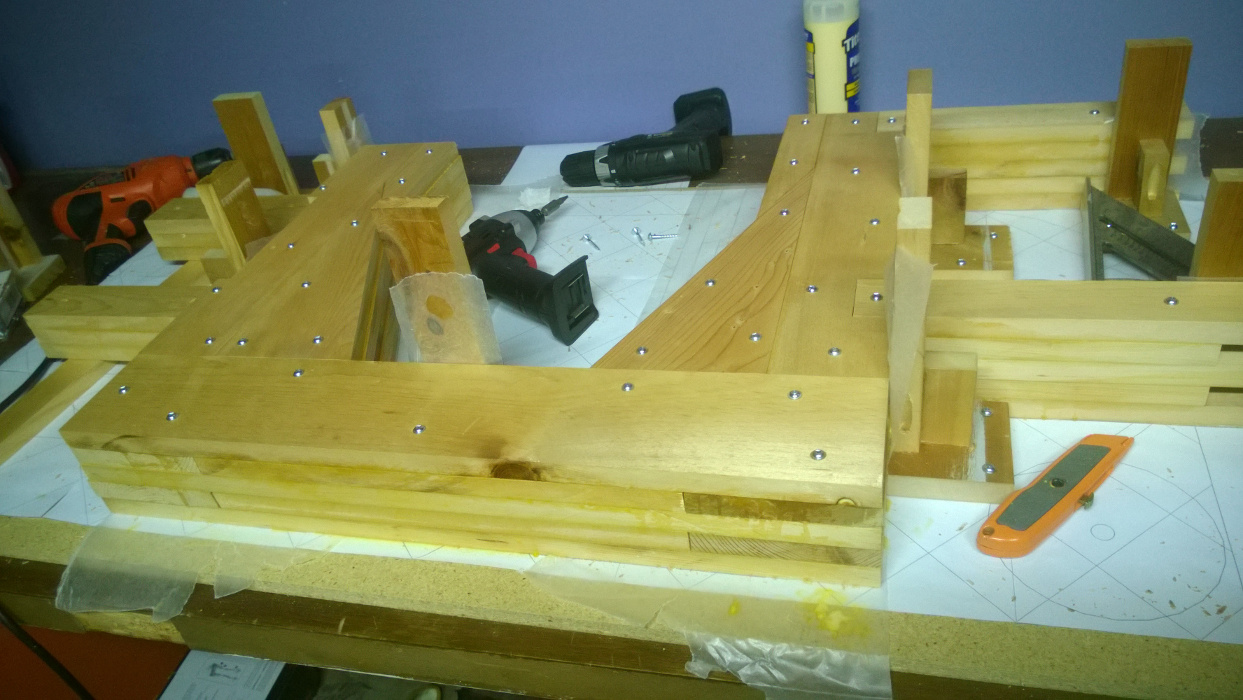
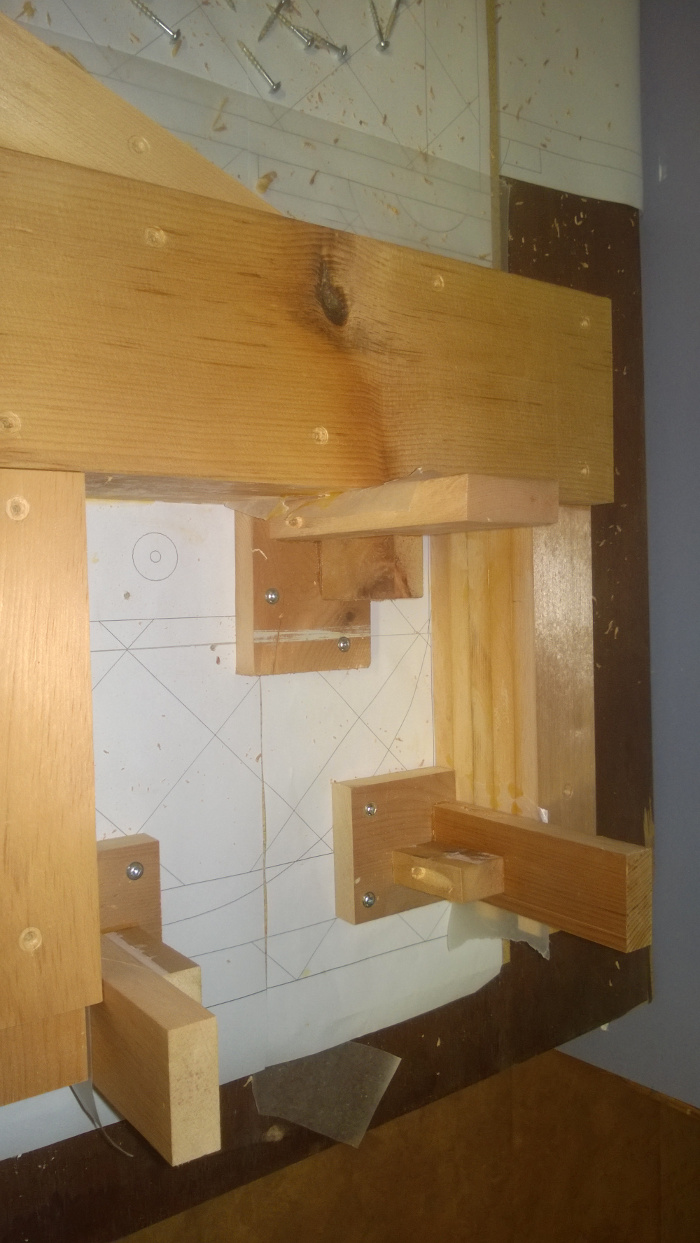
I more or less followed Rick and Larry’s ideas for gluing up the frame. I laid out the first few layers of the frame, and then screwed in a series of right-angle blocks that would keep everything tight and square. Then each layer would be screwed down into the layer above. Used pan-head screws, to hopefully lessen the damage to each layer relative to drywall screws. I did end up using some waxed paper underneath, and applied to each support block, to prevent any glue squeeze-out from bonding to things that were not the frame.
Were I to do it again, I would probably use more screws per layer, to increase the confidence level of how much pressure was being applied. But, since everything was planed before gluing, the face-to-face joints were already pretty tight. I like the frame, since things came out fairly square—no twist, and the top and bottom arms are parallel. There’s obviously some cleanup that could be done, as I had a fair bit of squeeze-out.
Wheel and Blocks
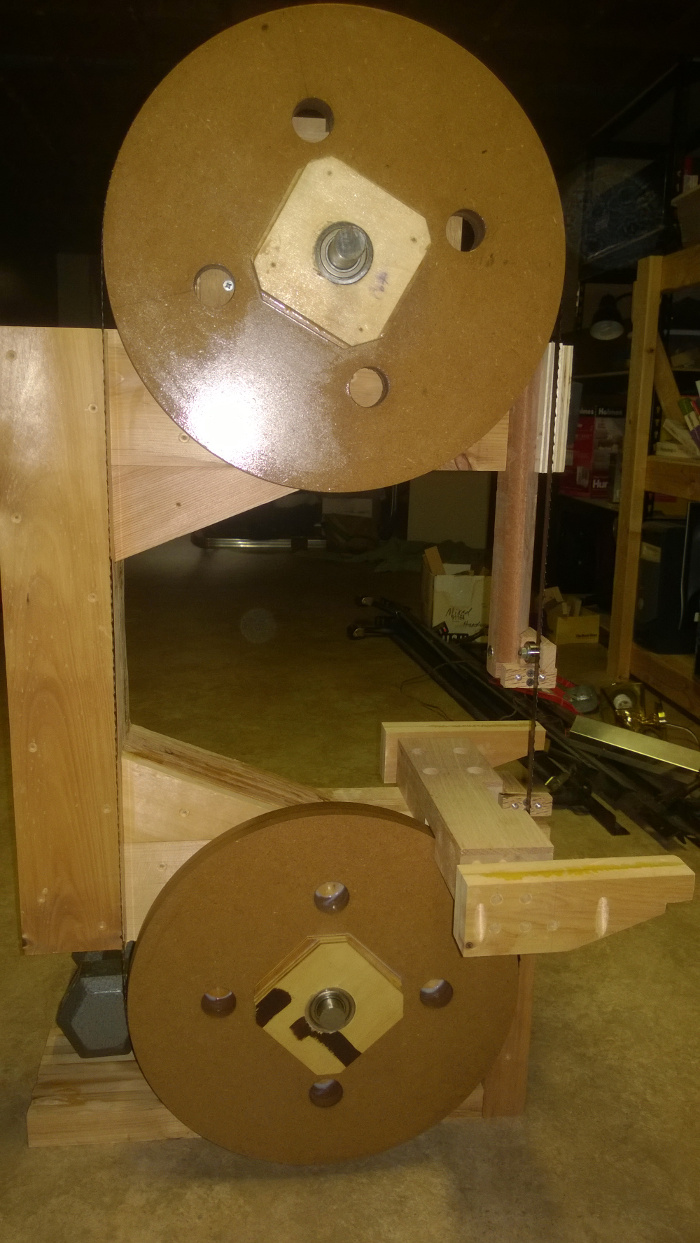
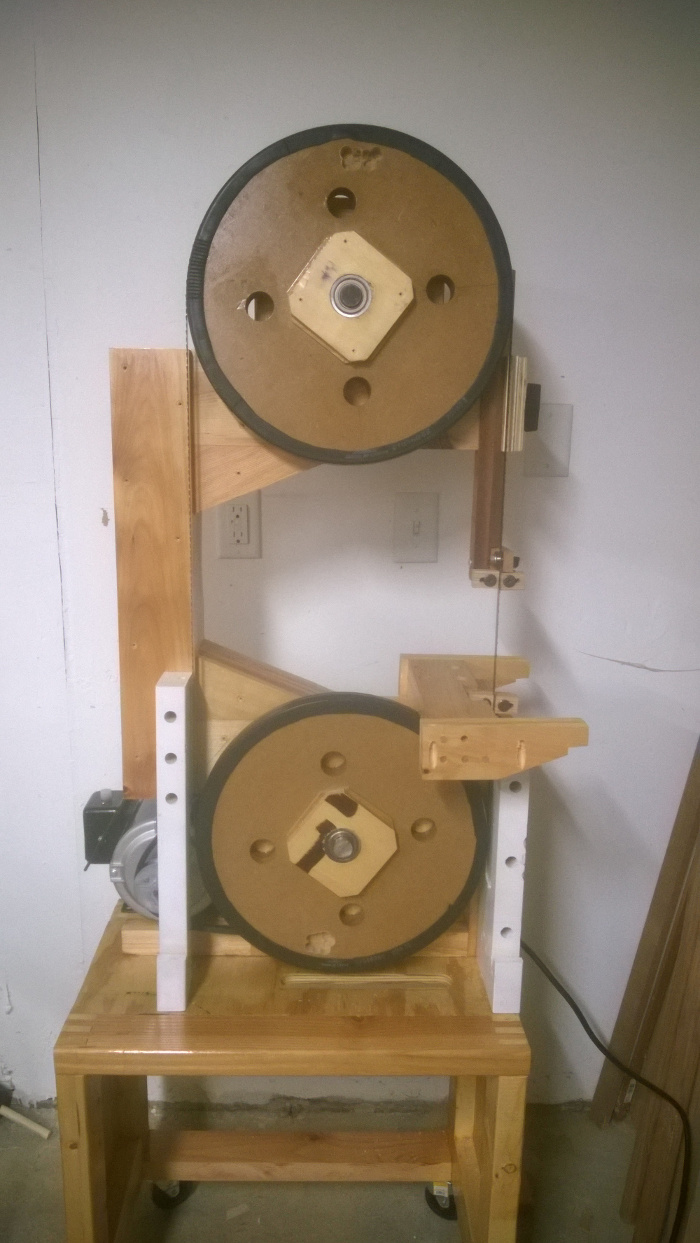
I decided to make the wheel blocks out of MDF (despite the general dislike of the dusty, grainless stuff). My goal here was to avoid having to do too much wheel balancing (banking on the consistent density).
Turns out I may have made the holes in the bearing blocks almost too small—I manage to crack one piece of plywood getting the bearing in. All others have held fine so far, especially now that they are glued on. Hopefully they’ll hold over time.
I left the MDF blanks square when I glued on the bearing blocks. This didn’t go nearly as smoothly as I wanted. Reading up on several other people’s builds (and Matthias’), I understood that getting the blocks perfectly centered, with no wobble of the wheels would be difficult. With one glued, I clamped on the second block, and attempted to adjust it to minimize wobble. Then, some pilot holes, apply glue, and screw in (using the pilot holes to get it back in the same spot). Unfortunately, despite the precautions, one wheel still had some wobble in it, and I think I’ll ultimately end up rebuilding that wheel.
(diagram of clamping)
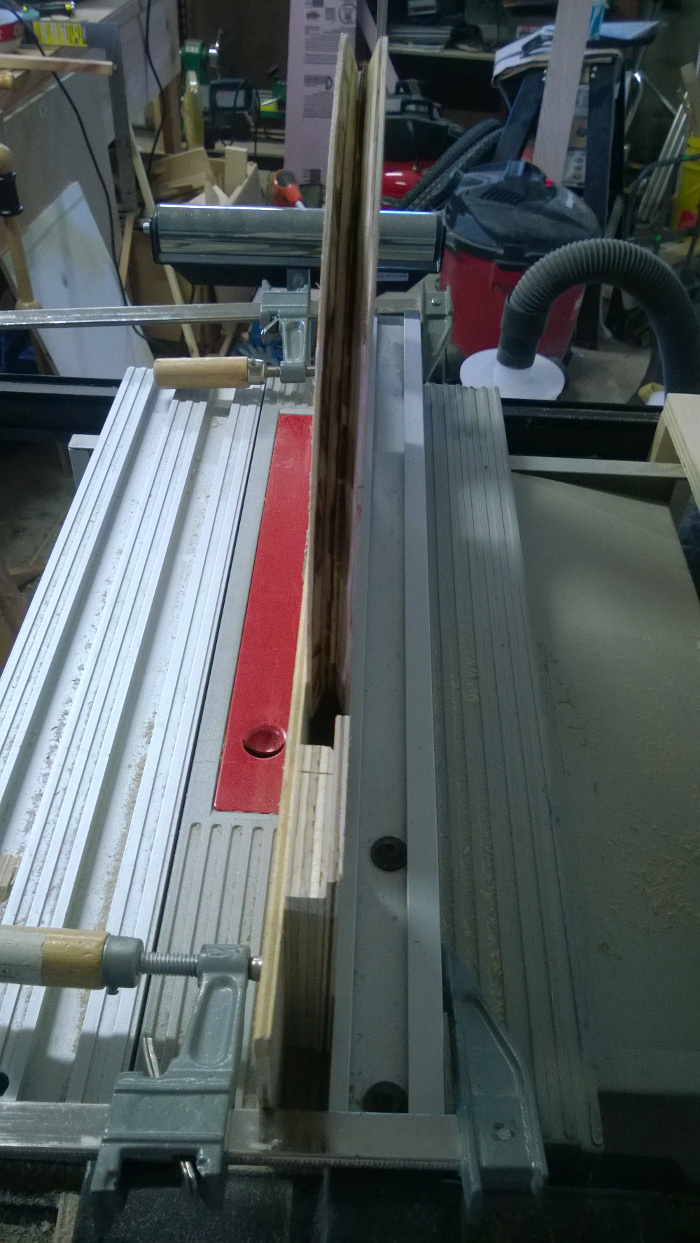
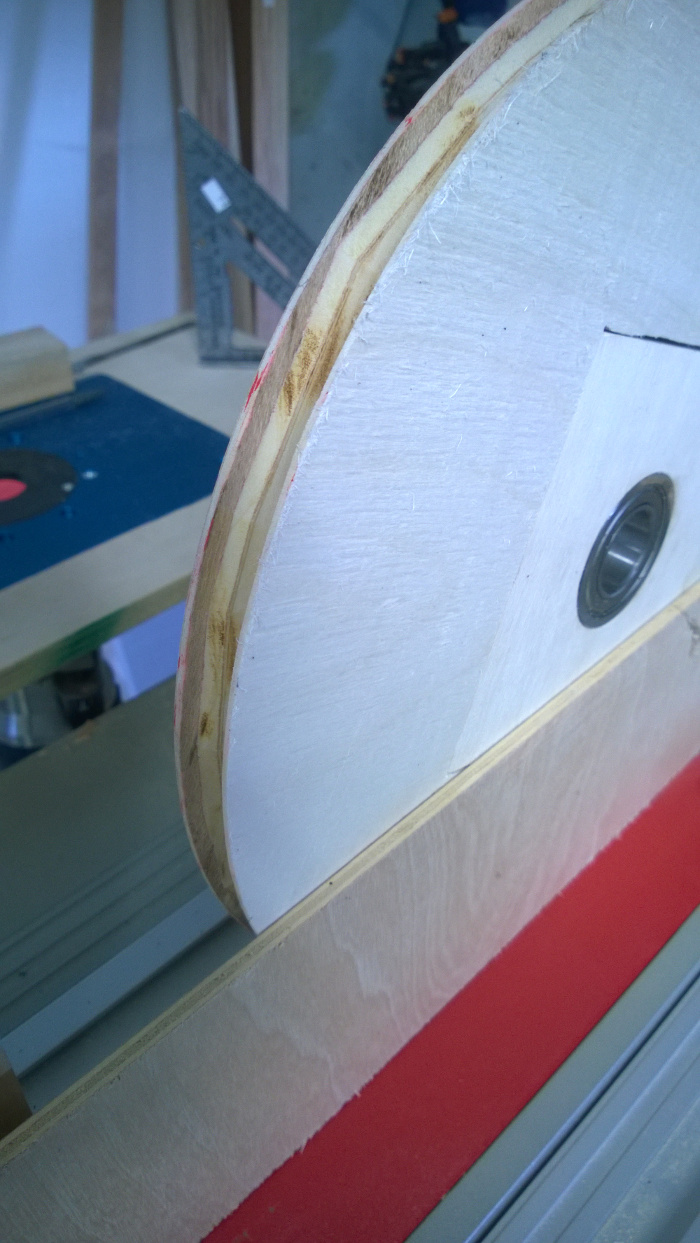
I’ve used the ‘table saw trick’ of cutting circles several times before, on other projects, so I wanted to do the same here. However, I planned to mount the bearings first on the wheel blanks, and then cut the blanks round. This should hopefully cause the wheels to be true relative to the bearings. Due to the arrangement of my table saw, I was able to mount a shaft vertically through the straight-edge, which let me turn the wheel blank on the bearings. I made small clamps to hold the blank almost immobile (so that it couldn’t turn and bind against the saw blade) but still move easy enough that I can use my hand to rotate it slowly.
(diagram of cutting)
The other change I made was to make the pulley and one bearing block a semi-integrated unit. Ultimately, this was probably silly, considering I’ll need to rebuild a wheel.
Misc. Pieces
In general, I did not have big enough blocks of hardwood for many pieces (such as the table supports), so I planed and glued up hardwood blocks as needed.
The carriage for the upper wheel mount is meant to be made by box joints. However, I had some scrap 1/4” red oak strips I had used for a previous project. I had to augment slightly, but I cut them up and laminated them together to mimic the box joints. Very strong.
Table
Okay. I got a little lazy, and didn’t want to immediately build the trunnions for a tilting table. I just wanted to use my bandsaw, dang it. So, I built the main mount, and some semi-permanent supports for a fixed table. The table itself is just scrap plywood (which I made slightly bigger with some spliced pieces). Instead of doubling up the depth, I glued and screwed two 1x2s across the length of it, to keep it flat. Despite this, the two areas on either side of the blade removal cutout are not quite level with each other, so there’s a third block of wood I can screw underneath to make things perfectly flat.
Cover
I’ve opted to do the main top cover and the bottom cover (the ones that cover the wheels and part of the blade). Going to experiment some with dust collection before I go and build any other cover pieces.
Somewhere/how, I messed up normal way of doing the blade safety around the upper guide, in two ways: * The blade comes way too close to the inside of the upper cover. Perhaps my wheels are too large, but getting a glade guard to recess partly in there is a no-go. * I think I cut the upper glade guide column at the incorrect angle (seems I reversed which angle was which?). There is little room to attach the normal bent metal blade guard.
I think I will end up having a guard on the outside of the top cover, that can be raised or lowered. Will have to design.
Finishing
Once I got the bandsaw finished enough to actually prove that it was going to work… I took it all apart for finishing. Here’s (approximately) the finishing I did. Nearly everything involved various open cans. * Main Frame: Shellac, water-based poly. * Most hard-wood pieces: spray-can poly (left-over from past projects, makes for quick light coats) * Cover and Table: shellac, white spray paint, spray poly.
Confession: I really didn’t bother sanding things, or spending too much time cleaning up glue squeeze-out… its a shop machine, not a work of art!